Setting up QT
What you’ll need
- A monitor
- A mouse and keyboard
- Wireless internet
QT has two ports: one USB-C and one USB-A. You’ll need to use the USB-C port for display and figure out how to control a mouse and keyboard. I suggest a USB-C hub that has a display port that you can use (USB-C or HDMI, for example) and has USB-A ports for your mouse and keyboard. Alternatively, you can use a USB-A hub to connect your mouse and keyboard to QT.
Note
If you have trouble using your mouse or keyboard through a USB-C port, try flipping the USB-C input going into QT. In theory, USB-C should go both ways, but in practice, sometimes not.
Head Computer Setup
Turning off the default face
If you haven’t already, SSH into QT’s head computer:
ssh qtrobot@192.168.100.1
Update QT:
cd ~/robot/packages/deb
git pull
sudo dpkg -i ros-kinetic-qt-robot-interface_1.1.8-0xenial_armhf.deb
Note
If the git pull step fails, the head computer might be having trouble with it its network. You can check this with ping google.com. If there’s nothing, there is a problem with the network. To fix this, the best think we’ve found is to restart QT: sudo reboot.
Edit a configuration file to turn off QT’s default face:
Open the configuration file:
sudo nano /opt/ros/kinetic/share/qt_robot_interface/config/qtrobot-interface.yaml
Change the line that says
disable_interface: falsetodisable_interface: trueSave and exit
nanoby hitting Ctrl+x, then typing ‘y’, and then hitting Enter twice to confirm things.
Note
You can reboot to see these changes take effect, or continue on and we’ll reboot eventually.
Setting up our code
Secure-Shell (SSH) into QT’s head computer:
ssh qtrobot@192.168.100.1
Install our project’s dependencies:
git clone https://github.com/robotpt/qt-robot.git
bash ~/qt-robot/scripts/pi_setup.bash
Increase the swap size, so we’re able to build without running out of virtual memory:
Turn off your swap memory:
sudo /sbin/dphys-swapfile swapoff
Open your swap configuration file:
sudo nano /etc/dphys-swapfile
Set CONF_SWAPFACTOR to 2 by changing the line that says
#CONF_SWAPFACTOR=2toCONF_SWAPFACTOR=2, that is by deleting the#character to uncomment the line.Save and exit
nanoby hitting Ctrl+x, then typing ‘y’, and then hitting Enter twice to confirm things.Turn the swap file back on:
sudo /sbin/dphys-swapfile swapon
Clone our repositories and build them:
Go to the source code directory in the catkin workspace:
cd ~/catkin_ws/src
Clone our repositories:
git clone https://github.com/robotpt/cordial
git clone https://github.com/robotpt/qt-robot
Build our workspace:
cd ~/catkin_ws
catkin_make
Note
It takes around five minutes for this command to finish. You can setup QT’s body computer at the same time as it runs, if you like.
Setup our code to run when QT’s head computer turns on.
Copy the autostart script into the correct directory:
roscp qt_robot_pi start_usc.sh /home/qtrobot/robot/autostart/
Enable the autostart script:
- Open a webbrowser on QT (e.g., Firefox) and go to http://192.168.100.1:8080/.
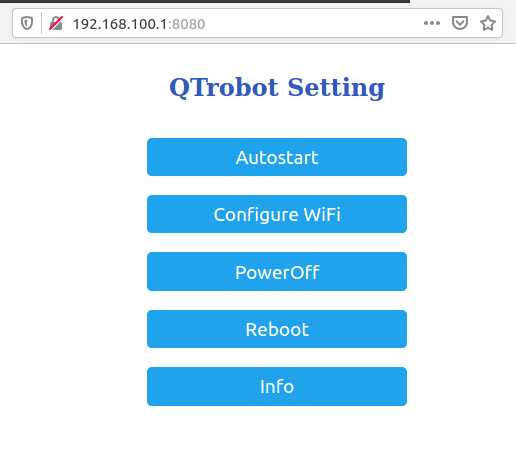
QT’s configuration menu.
- Click ‘Autostart’. You’ll be prompted for a username and password. Enter
qtrobotfor both. - Click the ‘Active’ checkbox next to
start_usc.sh.
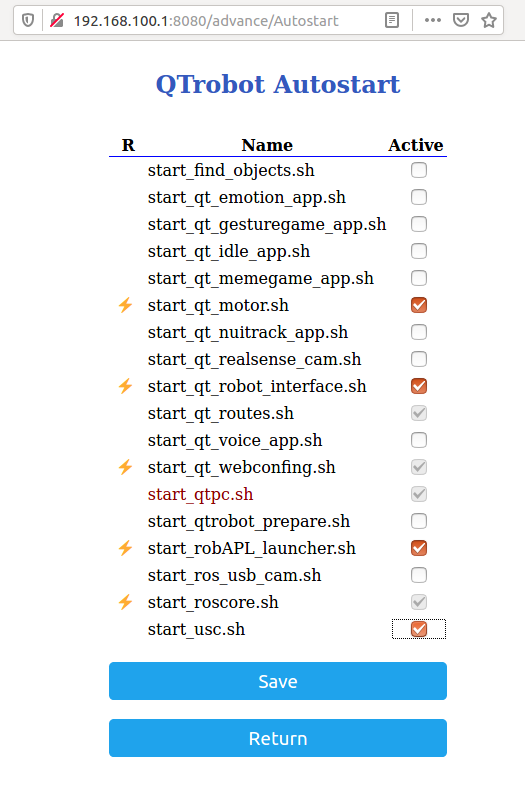
QT’s autostart menu with our script,
start_usc.sh, checked.- Click ‘Save’ and then ‘Return’ twice.
Note
You can reboot to see these changes take effect, or continue on and we’ll reboot eventually.
If you’d like, you can confirm that things are running after a reboot by opening a terminal and running the following command. You should see both /sound_listener and /start_face_server:
rosnode list | grep "/\(sound_listener\|start_face_server\)"

What you should see if the head nodes are running correctly.
Body
Getting your Amazon Web Service credentials
For QT to speak, we use Amazon Polly, which requires an Amazon Web Services account. At our current usage, using Amazon Polly is free up to a certain level), but you will need a credit card to create an account.
- Create an Amazon Web Services account.
- Once you sign in, in the top right of the page, click your account name (mine says “Audrow”), then in the drop-down menu click “My Security Credentials,” then click “Create New Access Key.”
- Record your access key and keep it somewhere safe. You can do this by downloading this or just viewing it and copy-pasting it to somewhere for later reference.
Note
It is best practice to create separate accounts with less access than your root account and use those access keys, see Amazon’s security best practices.
Setting up our interaction in a Docker container
Change your system timezone to be in your current timezone. To do this, you can click the time in the upper-right of the desktop on QT and then click ‘Time & Date settings…’
Open a terminal and clone this repository onto QT’s body computer:
git clone https://github.com/robotpt/qt-robot.git
Run a script to allow for updates:
sudo bash ~/qt-robot/scripts/nuc_setup.bash
Warning
If this step fails, try the following commands before rerunning:
sudo apt install --reinstall python3-six
sudo apt install --reinstall python3-chardet
Note
This step takes five minutes or so.
- Setup Cordial by following this guide.
Setting up remote access to QT
Get Dataplicity login credentials from Audrow and sign on. Go to the devices tab and then click “+ Add New Device”. Copy or enter this command into a terminal on QT’s body PC and enter QT’s password ‘qtrobot’. After that runs, remote access should be setup. You can confirm this by clicking the added device and confirming that you can explore the file system (e.g., ls /home/qtrobot).
Note
When you login on Dataplicity, you will be signed in with the user dataplicity. You should then switch to the user qtrobot with su qtrobot and then enter the password, ‘qtrobot’.